Pages

Saturday, March 19, 2016

Kjötsúpa (Icelandic Meat Soup)


Homemade Icelandic Lamb Soup
Homemade Kjötsúpa
My Icelandic food saga would not be complete without a post on Kjötsúpa or Icelandic Lamb soup. In our 10 days in Iceland, we probably had soup almost every day, and in almost half of those days, we enjoyed a bowl of lamb soup. My hubby and I could not get enough of Icelandic lamb. It has a very mild flavor and very tender. During the fall in Iceland, this warm meaty broth was the perfect lunch after a morning of activities.

I wanted to get an Icelandic cookbook while I was there, but things were rather pricey. It’s quite understandable: they had to ship everything in. Fortunately, I found a lamb soup recipe in, of all things, the free Visitor’s guide. Score! This will allow me to get more souvenirs.

Icelandic Lamb Soup from Old Iceland Restaurant
Kjötsúpa from Old Iceland, Reykjavík
The recipe also calls for a tablespoon of herbs - but it was not very specific. I am guessing that this refers to Arctic herbs. I looked around and the price point was a bit too steep for me and it had added salt (which was probably key). I decided not to get it. However, one of the chefs shared with us that he used a combination of oregano and parsley. I also read that arctic thyme is part of the blend, so I added a teaspoon of that. In place of the added salt, I used a combination of salt and celery seeds to reduce the sodium impact.

Since I’ve been learning a lot of technique from watching Food Network (Chopped or Beat Bobby Flay, nowadays), I decided to add some twists to the original recipe: browning the lamb, pan roasting the veggies to bring out the natural sweetness, and adding the dried herbs at the beginning to bring out the flavors. I can use any extra flavor that I can get since I do not have Icelandic ingredients which benefit from the clean environment (no GMO’s) and glacier clear water.

Here’s what I have so far. Try it and let me know what you think.

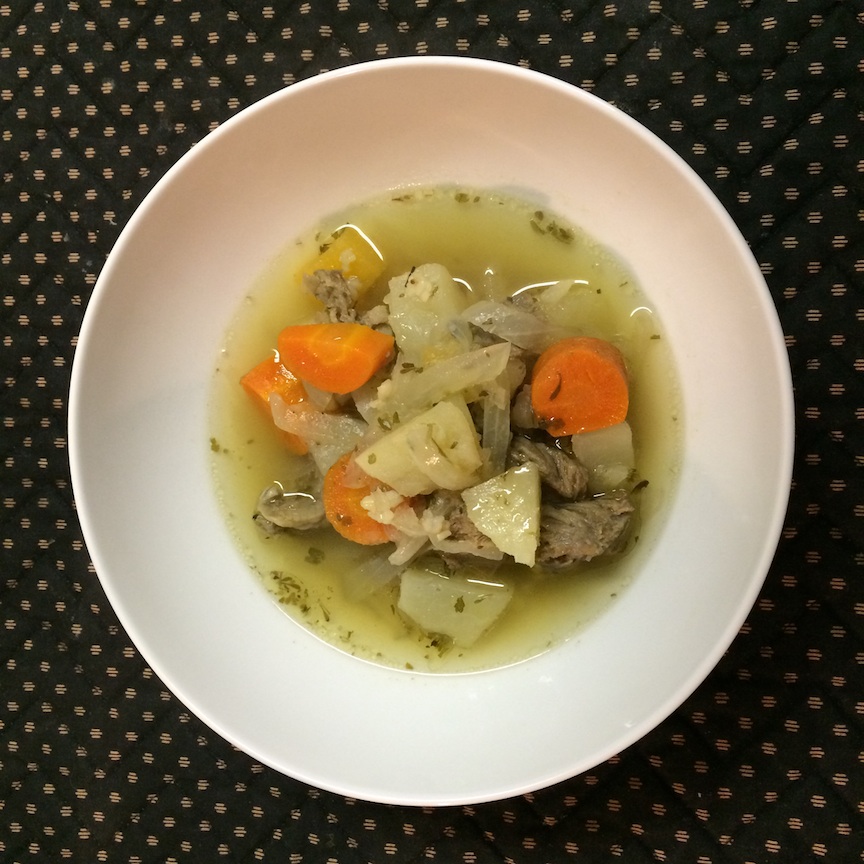
Kjötsúpa (Traditional Icelandic Lamb Soup)
Based on a recipe from the Iceland/Reykjavík Visitor’s Guide

Ingredients
  • 2 Tbsp of olive oil
  • 14 oz of lamb (best to get the end of the neck, I was lucky enough to get some)
  • 3 1/4 cups of water
  • 1 medium sized onion (about a cup)
  • 1 cup of sliced rutabaga
  • 1 cup of sliced carrots
  • 1 potato (about a cup)
  • 1-2 Tbsp of rice
  • 1 tsp of dried oregano
  • 1 tsp of dried thyme
  • 2 tsp of dried parsley
  • 1/4 tsp of celery seeds
  • 1/8 tsp of salt (use up to a 1/4 tsp, if you prefer)

Directions
  1. In a Dutch oven, heat oil over medium heat.
  2. Brown lamb on both sides for about 5 minutes.
  3. Transfer lamb to a plate and set aside.
  4. Add onions and cook until onions begin to soften.
  5. Add rutabagas, carrots, potatoes, salt, and herbs. Cook for about 5 minutes.
  6. Return lamb to the pot and add water. Cook at low heat for about 45 minutes.
  7. Add rice (At this point, you can shred the meat too and add it back in).
  8. Cover. Simmer until rice is cooked and vegetables are tender.

Lamb soup simmering
Simmer, simmer, simmer


Verdict

Traditional Icelandic Lamb Soup
Kjötsúpa from Fjallakaffi, Modrudalur
I love this recipe. It did bring me back to our first evening in Reykjavík or that rainy day, in the middle of nowhere, where we saw an Arctic fox outside of the cafe or that other rainy day right after seeing the grandeur of Strokkur. This is a good local substitute without the airfare to Reykjavík.

Of course, this soup is not the same without the same quality ingredients as what you get in Iceland. Icelandic lamb is very good quality meat since the sheep in Iceland roam free in the hillsides and feast on grass all year. The water used in the broth is probably the best in the world. This is glacier pure water, so it is drinkable from the tap. This same water irrigates the herbs and vegetables in the soup and grass that the lamb munch on. This is what makes the soup so delicious.

In retrospect, I should have bought herbs from the local grocery store (which I love to visit) and could have purchased them at a more reasonable price than in the tourist shops. Of course, I am not sure how the TSA would react to bringing in herbs into the country. 
Lamb soup with lots of lamb
Kjötsúpa from Geysir Cafe - humble plating, but meaty!

Also, I did learn that each family had their own unique recipe. Some may not have any grains, while others may prefer oatmeal or barley. The vegetables may vary too depending on what is available in the market.

I am thinking this recipe will evolve with our family: most likely starting with the use of quinoa for grains and oh, do I dare say, adding kale! I think its a State law now in California that you must add kale to anything when you're cooking (joke).

Hope you enjoy!

Saturday, February 13, 2016

Hafraklattar (Icelandic-style Granola "Bars")


I am a grazer. Although I do not skip meals, I usually have smaller meals and have snacks through the day. When we visited Iceland over the fall, I was no different. Whenever I have a chance, I would stock up on nuts, fruit like apples or bananas (lemons too), dark chocolate or breakfast items. Also since I really cannot enjoy buffets anymore (doctor’s orders), I usually have something handy in the event that I cannot find an appropriate breakfast… or lunch. Plus, I love trying out the local treats.

Hafraklattar with coffee
Yum! Morgunverður með kaffi - Breakfast with coffee.
I believe I bought my first hafraklattar in my first day in Reykjavik.  This hafraklattar from Matarkistan seems to meet all the criteria of a light breakfast or a big snack: portable and quick. Most importantly, it looks somewhat healthy although I do not know what the ingredients are… yet. It took me a couple of days for the jet lag to pass and consult Google Translate - on my phone - to figure out what is in it. Thank goodness WiFi was everywhere (even on the buses).  I did find out later that hafraklattar was relatively healthy: made with oats, pumpkin seeds, cranberries, apple sauce, butter and sugar. All were organic too.

Now that I am back at home but mentally still in Iceland…my mission is to replicate what I enjoyed in Iceland. Obviously, the bars in Reykjavik became my reference of what hafraklattar should look like: square and bar-like, much like a brownie. However, in my research, I found that these are actually normally round like a cookie. 

Hafraklattar Ingredients
Ingredients: Relatively Healthy!
Also, I had to interpret the recipes that I did find because Google cannot translate everything perfectly. As an example, one of the instructions in the recipe translated to “Butter and sugar mix well”. Since I remember that the hafraklattar in Reykjavik was soft, I decided that it would be better to cream the butter and sugar mixture.

Also, since I am trying to have more gluten-free food – I used GF flour for this recipe. I really was not too sure about spelt flour, which is what most of the recipes called for. So, I just used a combination of oat flour and rice flour. I also tried to cut down on the butter and substituted half (about 1/4 cup) with unsweetened applesauce. The ingredient list in Matarkistan used applesauce, so I was encouraged. However, I was not sure what the proportions were. My test ratio, surprisingly, worked out very well. 

Here’s what I have so far. Why don't you give it a try and let me know how you like it!

Hafraklattar (Icelandic-style Granola Bar)
Based on a recipe from Tastebook.com by Auður Karitas Þórhallsdóttir
Makes about 9 cookies


Ingredients
  • 3/4 cup gluten-free flour (I used 2/4 cup of oat flour and 1/4 cup of rice flour)
  • 1/2 tsp baking powder
  • 1/2 tsp baking soda
  • pinch of salt
  • 1 tsp cinnamon

  • 1/4 cup soft butter, room temparature
  • 1/4 cup applesauce
  • 1/4 cup sugar 
  • 1/4 cup brown sugar 
  • 1 tsp vanilla
  • 1 egg

  • 1 1/2 cups oatmeal
  • 1/4 cup raisins (optional)
  • 1/4 cup chocolate (optional)


Directions
  1. Preheat oven at 375 degrees F.
  2. Mix flour, baking soda, salt and cinnamon in a bowl. Set aside.
  3. Cream butter, sugar, brown sugar, vanilla and eggs in a bowl.
  4. Fold in applesauce.
  5. Fold in dry ingredients to wet.
  6. Mix oatmeal and if using, the chocolate and raisins.
  7. Created balls the size of tomatoes and slightly flat out (I used an ice cream scoop).
  8. Bake at 375 F for about 13-15 mins.
  9. They should be a little soft when they are taken out, but harden as they cool.


Verdict:

I really like this "bar". It actually has a consistency of a cookie – so I feel like I am having cookies for breakfast. Unlike a cookie, this is also quite filling. I am finding that a cookie and a half is more than enough. I may make smaller ones next time.


Hafraklattar - Homemade


I may try to change the add-ins next time, maybe use dried blueberries, cherries, pumpkin seeds, chia seeds, or nuts… definitely add nuts... I am nutty that way. Also, I may make a crunchier version. No butter creaming, just melt it – or use coconut oil. But that may not be considered hafraklattar anymore.

Hafraklattar Breakfast

Also, I am not sure what Hafraklattar translates to. All I know is it is an Icelandic-style granola bar/cookie. I hope some of you can shed some light to it.


Saturday, January 23, 2016

Eplakaka (Icelandic-style Apple Pie)


Icelandic-style Apple Cake or Apple Pie
This was my first attempt. The flavors brought me back to Reykjavik.


My first encounter with Eplakaka was quite accidental. It was a rainy day in Reykjavik, much like today, and we decided to spend the day visiting museums. We wanted to get an early start so we skipped breakfast. However, halfway through our walk, we needed to dry up and took shelter at the Maritime museum. We took that opportunity to have breakfast.

My husband had his usual ham and cheese sandwich. He has been having a ham and cheese sandwich almost every day while we were in Iceland, and he wanted to be consistent. For me, I had my eye on a yummy looking cake. Since I typically have something sweet for breakfast, I knew that was the one I wanted to try. I am always up for a food adventure -- as long as it's in my doctor-approved list (health first, you know). When I asked the server what it was, she said was apple pie.


Original Apple Cake
Original Eplakaka from the Maritime Museum
Sure enough, it was delicious: apples baked in the dough, lightly topped with confectionaire's sugar and served with fluffy light whipped cream and a hint of chocolate sauce. I knew I had to recreate it when I get back home. What timing! Since I made a peach galette during the summer, I have been meaning to make an apple galette for the fall. I figured why not make an Icelandic-style apple pie, instead. I may still have apples that I froze before the trip at home.

I researched the recipe, but all I found were recipes in Icelandic. Thank goodness Google Translate made it easier. However, there were some items where the translation was a bit questionable, so I had to guess based on other recipes. One of the changes that I made was also use recipes for apple cake. Reason is that although the lady said this was an apple pie, the consistency of the crust was more like an apple cake, so I used other apple cakes for reference (mostly non-Icelandic).

Given my current preference for gluten-free treats nowadays, I used a combination of oat flour and rice flour.  I only made half of the recipe since we were watching our sugar intake, but you can easily double it. I found that this is size is perfect for me and my husband and the cat. 

Here's what I have so far... let me know what you think.


Gluten-Free Eplakaka (Icelandic-style Apple Pie)
Serves 4

Ingredients
  • 1 cup of gluten-free flour (I used 1/2 cup of rice flour and 1/2 cup of oat flour)
  • 1/2 stick of butter
  • 1/3 cup of sugar
  • 1 egg
  • 1/2 tsp baking powder
  • 1/2 tsp of baking soda
  • 1 tsp cinnamon
  • 1/4 tsp of nutmeg
  • Pinch of salt
  • 2 apples (medium size), sliced (about a cup and a half)
  • 1/4 cup raisins (optional)
  • 1/4 cup walnuts or pecans (optional)
  • Yogurt (Greek or Icelandic) (optional for serving)


Directions
  1. Butter or grease a loaf pan.
  2. Preheat oven to 350 degrees F.
  3. Whisk together flour, baking soda, cinnamon and nutmeg, salt
  4. Cream butter and sugar.
  5. Add eggs and vanilla to the butter mixture. Continue mixing until combined.
  6. Add dry ingredients to butter mixture.
  7. Scrape the mix in to the pan.
  8. Add apples and raisins on top of the batter
  9. Bake for about 30-35 minutes or until a toothpick comes out clean.
  10. Let cool and serve with whipped cream or Greek (or better yet, Icelandic) yogurt


Verdict

This recipe came very close to what I had in Reykjavik. The first time I made this, I used apples that I froze before the trip. I thought it was fortunate and quite appropriate to use those the frozen apples since they also survived the trip to Iceland (It was also one of my first freezing tests, and it was successful).

The first time I made this I put the apples on top instead of mixing it in the batter. I think I found a recipe that said the apples would sink in the batter in the baking process, so I thought I would use that technique. Unfortunately (or fortunately), only some of them sunk and the others baked on top. As a result, it actually gave it the apples that galette/tart consistency. I like it.

Icelandic style apple pie
Added some dough on top of the crust: pie like?
I've also experimented in presentation and used some of the dough and putting it on top (much like a pie crust or coffee cake). This ended up with the same look as the cake I had in Reykjavik. I like this method too... it just depends on my mood.

In doing my research, I was also surprised that Icelanders use a lower temperature to bake. Not sure why, but I find that increasing the temp here in California a bit makes it cook better. Any ideas why?

Lastly, I did not make the vanilla sauce since the cake that I had in Reykjavik came with whipped cream (and I was and still am watching my sugar and fat intake as it is). However, if you want to make it, the recipe is below. The full recipe is below, so you can put as much vanilla sauce as you want.


Hot Vanilla Sauce (full recipe)
Serves 8


Ingredients
  • 4 Tbsp butter
  • 1/2 cup of cream (125 ml)
  • 1/2 cup sugar (100 g)
  • 1/2 tsp vanilla


Directions

  1. Make vanilla sauce by putting the butter, cream and sugar together in a saucepan and stir constantly until the sugar has melted. 
  2. Let them simmer gently for about 10 minutes, stirring frequently. 
  3. Remove from heat and add vanilla.