Pages

Sunday, April 28, 2013

My Big Fat Greek Baklava


Baklava Parcels I still had some phyllo dough from my Bastilla adventure last week. So before the remaining phyllo dries out, I decided to attempt to make baklava. This was perfect because I bought walnuts for some muffins last week (a topic for another post) and still had about a half a cup of almonds left.

Baklava is my favorite Greek dessert or afternoon snack. It is composed of layers of buttered phyllo dough, filled with nuts, and topped with syrup or honey. It is very decadent and great with Greek coffee. During Greek Festivals, we often end our visit with coffee, medium sweet and baklava; the times that we don’t – they have ran out.

After my experience with handling phyllo last week, I felt more confident with handling the fine dough. I still need more experience and this would be a good opportunity to do so. However, I don’t want to make a full 9 by 9 inch tray of baklava. Again, it’s only the two of us, and I was not planning to go to the office this week. The office is where I usually I bring extra sweets – it’s gone within an hour.

I found a recipe in the food Network site for a Simple Baklava by Giada de Laurentis. She uses phyllo parcels which I think is rather elegant. I used that as a starting point. This recipe also uses a mini-muffin tin, so that is an added bonus. I love working with my mini-muffin tin.

Given that, I do not have the apricots nor breadcrumbs that her recipe calls for. So, I consulted a Greek cookbook, which we bought in one of these festivals.

I also opted to include the traditional syrup that is used as a topping. I used the ingredients from the Greek cookbook and just experimented on the proportions.

Verdict:

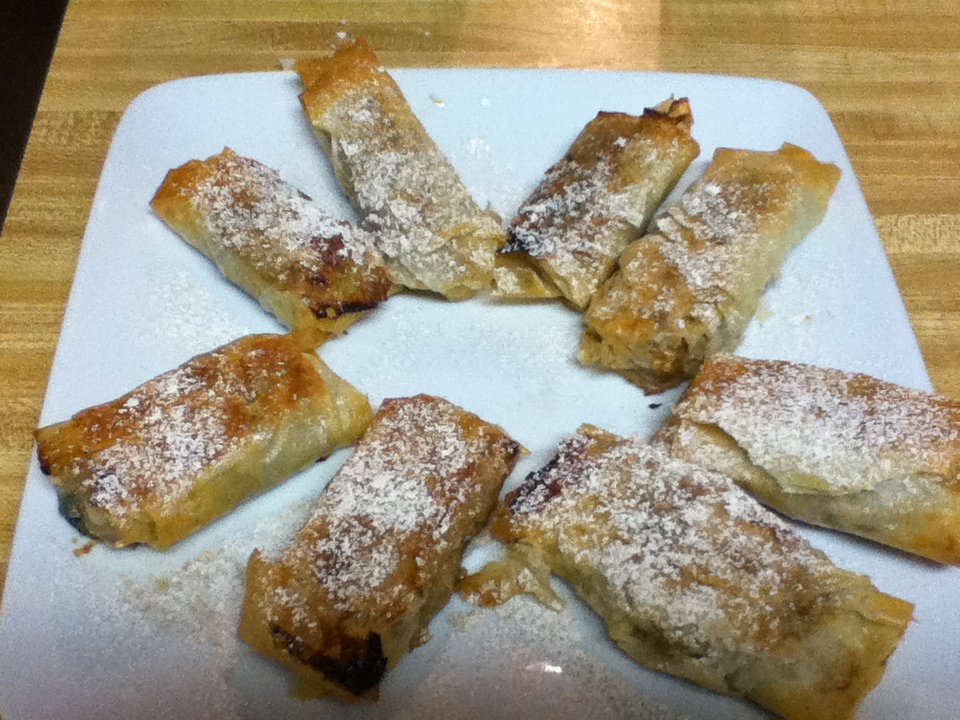
The finished product was delicious and tasted like the baklavas we’ve had in the past. Instead of a Big Fat Baklava, I ended up with a Petite Baklava Bite, but it's yummy and more mindful of portion size. Each parcel only had about 2 teaspoons of the nut mixture so it is healthy, but not too excessive.

The parcels may have too much phyllo. I may just use 4 sheets next time, and instead of following Giada’s instructions on how to divide the phyllo (Cut lengthwise into 4 pieces and widthwise into 3 pieces), I may cut it 4 x 4 length and width or in 3” x 3” pieces

For a more decadent feel, it needs more nuts. I think I goofed on the proportions on my first attempt (most likely, because I eliminated the apricots and breadcrumbs). Next time I will need to add another 1/4 cup of nuts.

Lastly, as a simpler variation, I may just use confectioners’ sugar and cinnamon as a topping. This will be much easier to make than the syrup and perhaps less cleaning.

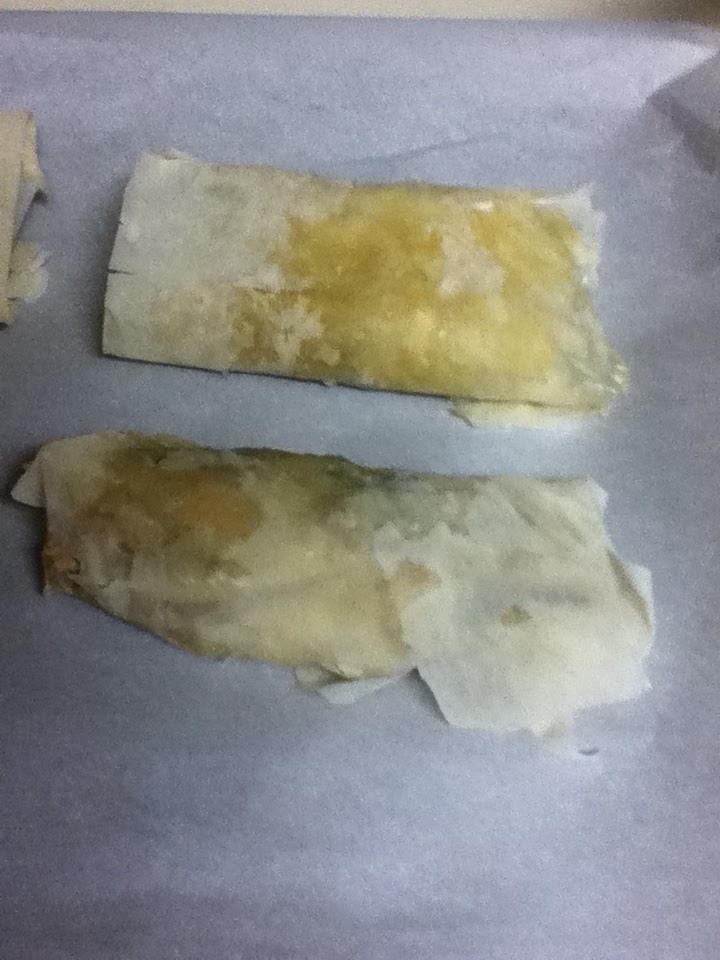
Unfortunately, I was not able to take pictures of the process, only the finished product. I was concentrating too much, especially the layering and cutting of the phyllo . Next time, and there will be one, more pictures will be taken. I think the pictures will be helpful.

Baklava up-close


Mad Gourmet’s Simple Baklava Parcels
Ingredients

Baklava
·       2 Tablespoons almonds, slivered
·       1/4 cup + 2 Tbsp walnuts, finely chopped (I did not have a food processor so I used a Ziploc bag and a meat tenderizer)
·       1 Tablespoon sugar
·       3/4 teaspoon ground cinnamon
·       1/8 teaspoon ground cloves
·       Pinch of salt
·       1 /2 stick butter, melted, divided
·       1 1/2 Tablespoons honey
·       6 sheets phyllo dough

Syrup
·       1/4 cup sugar
·       1/4 cup water
·       1/4 teaspoon vanilla
·       1/4 teaspoon lemon rind, grated


Equipment: Mini-muffin tin

Directions:

1.     Preheat the oven to 350 degrees F.
2.     Place the sliced almonds, walnuts, sugar, cinnamon, ground cloves, and salt in a bowl and mix thoroughly.
3.     Add 1 tablespoon of the melted butter and the honey and stir to combine.
4.     On a dry work surface place 1 sheet of phyllo. Using a pastry brush and the remaining melted butter, lightly cover the entire sheet of phyllo with melted butter. Cover the first sheet with a second sheet of phyllo and brush with melted butter. Continue until there is a stack of 6 sheets of phyllo.
5.     Cut the stacked phyllo rectangle into 12 equal pieces (Cut lengthwise into 4 pieces and widthwise into 3 pieces. This will end up into a rectangular shape – see my Verdict)
6.     Carefully press each cut piece of phyllo into the mini-muffin tin cups. Press 2 teaspoons of the nut mixture into each of the phyllo cups.
7.     Gather the ends of each of the phyllo squares and tuck to make a sachet shape (Sorry, here’s where a picture may come in handy).
8.     Continue shaping the remaining sachets in the other mini-muffin tin.
9.     Bake until the edges of the phyllo are golden, about 20 to 25 minutes.
10.  While baklava is baking, combine sugar and water in a small saucepan over medium heat and bring to a boil. Stir in honey, vanilla and lemon zest, reduce heat and simmer 20 minutes.
11.  When ready, remove the baklava from the oven and immediately spoon the syrup over it.
12.  Let cool completely before serving. Store uncovered.


Postscript: 

I should have made 24 pieces. After almost 24 hours, there is only one piece left. That is what I consider a success!

Kali Orexi! (A Good Appetite)

Sunday, April 21, 2013

Phyllo Dough Novice: The Making of Moroccan Chicken Bastilla


I have always wanted to work with phyllo. I love baklava and spanakopita. So, in spite of stories of how difficult it can be to work with, I knew I had to give it a try. I saw recipes in the Greens cookbook for Vegetarian Filo Turnovers, but I thought I would start with something I knew I liked.

I remembered enjoying a delicious phyllo pie when we go to El Morocco, a local restaurant. I thought that would be my best candidate: sweet and savory at the same time, had a good portion of protein, and topped with a generous dusting of confectioner’s sugar. The pie was a quite big for two, so I thought to make it in appetizer-size pieces.

I found a couple of great recipes. The first one was from The Kitchen Alchemist for Chicken Pastilla Parcels, and the next one from a Moroccan hotel & spa. The filling from the Morrocan Spa seemed to have a simpler approach (and I do not have a food processor to mince the chicken), but I wanted to consult the Kitchen Alchemist’s technique since I am doing snack size pieces.

My recipe is available in a different post. If it’s your first time doing this (or you have advice for me), please read on.


Making the Filling

So I followed the recipe and felt good. There was a lot of work, but the kitchen smelled really great. The onions and cinnamon cooking produced a wonderful aroma. Also adding the spices just added to the delicious scent.

Instead of 3 pigeons, I used 3 chicken thighs (I figured that would be about half). Everything was going great – until I realized I forgot to defrost the phyllo – a rookie mistake. (Actually, this was not my first time making this mistake; the first one involved a turkey. I guess that proved who the real turkey was.)

I decided to salvage what I made. I saved the chicken thighs meat, put the phyllo in the refrigerator to defrost. I also saved the egg mixture but opted not to use it because my tummy usually does not agree with day old eggs.

The next day, I made the egg mixture again. While the chicken stock mixture was simmering, I put the chicken meat in there for extra flavor. Messing up on Day 1 actually proved to be a blessing in disguise: not only did it split the work up, but it also gave me an idea for leftover roasted chicken! I ended up using only half of the chicken meat and the rest went to (of all things) my hubby’s turkey chili.

When the mixture was close to a boil, I fished the chicken meat out (or chicken it out) and made the egg mixture.

Stuffing the Phyllo

Making the phyllo rolls was trickier than I thought. The dough is so thin, delicate, and easy to tear. I should have stuck to making the pie because THAT would be a lot easier, but I have gone so far so I might as well continue (plus I have a standard pie pan and now not enough filling).

Fine phyllo. It's like working with lace. These are the scraps.

I started (more like struggled) with one sheet and buttered it. Then I put the one tablespoon of the filling and one tablespoon of the egg mixture. I cut the sheet and proceeded to roll. The first one was quite challenging, but it became easier as I proceeded. Also, I found that using two sheets may be better, especially for newbies.

rolling phyllo
Rolling phyllo - Note the first one is uneven
In retrospect, I should have cut first, then roll. This option would be great since I did not have enough counter space. My original vision was to make them like eggrolls, in honor of my Asian heritage. However, it may have been easier if I made them into parcels like what The Kitchen Alchemist described.


Ready for baking.

I baked them for about 20 minutes, turning about halfway. I let it cook for a bit and then dusted it with cinnamon sugar. Yummy!


Verdict:

The result was very delicious and brought me back to dinners at El Morocco. I also liked the appetizer size because it makes it an easy snack or appetizer.  Most importantly, my husband gave it a “thumbs up.”

Completed Bastillas. Yummy!

Making snack-sized bastillas was labor-intensive, so set aside about 2 hours (more if you are starting from a raw chicken). As mentioned, making the pie may be 50% easier, bit you don’t have much flexibility of baking only what you need.

I do wish that the filling was just a tad sweeter. I saw a recipe for bastilla using orange zest in the filling. For next time, I may use that for more sweetness.

Lastly, I wish I had seen this wikihow post on working with Phyllo Dough. This may have saved me some time. Also, remember to defrost the phyllo (Check the package for defrost instructions) It made a world of difference.

Mad Gourmet’s Moroccan Chicken Bastilla


Adapted on the recipe from Les Borjs de la Kasbah and The Kitchen Alchemist.
Makes about a dozen snack-sized pieces (Good for four people or two really hungry ones)

For my experience in making these, check out this post.

Not eggrolls. Moroccan Bastillas. Yum!

Ingredients
·      1 Tbsp vegetable oil
·      1/4 medium sized onion, chopped
·      1 inch piece fresh root ginger, grated
·      1/2 tsp ground cloves
·      1/2 tsp freshly grated nutmeg
·      1/2 tsp ground cinnamon
·      1/2 c chicken stock
·      Salt and freshly ground black pepper, for seasoning
·      1 c of chicken meat, diced
·      1 free-range egg, beaten
·      About 2 Tbsp unsalted butter, melted
·      Small handful chopped fresh parsley
·      Small handful chopped fresh coriander
·      few saffron strands, optional (Original recipe calls for this, but I did not use it – It’s pricey.)
·      1 tsp sugar
·      2-3 Tbsp of slivered almonds, toasted, roughly crushed
·      Phyllo pastry (I used about 6 sheets, but I am a novice)
·      Confectionares’ sugar with cinnamon, to serve

Preparation
1.               Heat the vegetable oil in a large frying pot and fry the onions for 6-8 minutes, or until softened.
2.               Stir in the ginger, cloves, nutmeg, cinnamon and stock and season with salt and freshly ground black pepper.
3.               Add the chicken meat to the pot.
4.               Bring the mixture to the boil, then reduce the heat and simmer for one hour, adding more water or broth if the mixture becomes dry.
5.               Preheat your oven to 350°F.
6.               Remove the chicken from the pan and set aside to cool.
7.               Meanwhile, continue to cook the onion mixture until thickened.
8.               Add the beaten eggs, butter, herbs, saffron, sugar and almonds to the pan and cook over a gentle heat for 4-5 minutes, stirring regularly, or until the mixture resembles scrambled eggs. Remove from the heat.
9.               Take two sheets of pastry and cut it in about three inch strips.
10.           Take a strip and brush it with melted butter.
11.           Place a 1 teaspoon sized dollop of the cooled chicken mixture and 1 teaspoon sized of the egg mixture onto one end. Fold the pastry like an egg roll. Fold them over until you get toward the end of the sheet and brush some melted butter over the end strip so that when you give it the final fold it stays shut.
12.           Repeat until you have as many parcels as you need and place them on a baking sheet lined with parchment paper (I used my favorite cookie sheet).
13.           Bake for 20 to 25 minutes in the oven, turning them over half way. They’ll be done when they’re nicely golden brown.
14.           To serve, Remove the bastilla from the sheet and let it sit on a plate or serving dish, and dust with cinnamon confectionares’ sugar or just serve on it’s own.

Alternate folding approach (From The Kitchen Alchemist Recipe):

1.     Take a sheet of pastry and cut it in half lengthwise.
2.     Place a ½ tablespoon teaspoon sized dollop of the cooled chicken/egg mixture onto one end.
3.     Fold the pastries up into a triangle, and the edge of the triangle then folds in again (a bit like folding a flag, or practice on a strip of paper before having a go until you get the knack). Fold them over until you get toward the end of the sheet and brush some melted butter over the end strip so that when you give it the final fold it stays shut.

Tips and Alternatives:
·      If you are starting with raw chicken meat, it may be best to cook them in the onion mixture. For thighs (which is what I started with), it produces a lot of chicken fat. You should reduce the fat and perhaps add a bit more spice to the mixture (I just have not played with the proportions just yet).

·      (Also from The Kitchen Alchemist) For extra sweetness, lightly dust the top and the length of the pastry strip with the cinnamon sugar.

Happy eating!

Thursday, April 11, 2013

Peanut Butter + Chocolate + Bananas = Healthy Peanut Butter Brownies = Yum!

Peanut Butter Brownies - side viewTime for another Brownie experiment! My husband has been enjoying peanut butter and chocolate candy bars, so I thought I would make him Healthy Peanut Butter Brownies. Bananas are great with peanut butter, so I decided to use one of my variations and use mashed bananas instead of butter.

As for the peanut butter topping, I decided to start my search in AllRecipes.com. since I’ve had good luck with their recipes. I found Michelle’s Peanut Butter Marbled Brownies. I used Adam’s Creamy Peanut Butter since it only contains peanuts and no additional oils, partially hydrogenated or not.

I also opted to use My Basic Brownie Recipe. Besides, I have already tried mine with mashed bananas, and I think it’s great.

Here's the recipe...

Mad Gourmet Peanut Butter Marbled Brownies
Based on Michele’s Peanut Butter Marbled Brownies from AllRecipes.com

Ingredients

For the Healthy Banana Brownies:
  • 1/2 cup mashed bananas, preferably over-ripe
  • 2 tablespoon melted butter 
  • 2/3 cup brown sugar  
  • 1 teaspoon vanilla extract
  • 2 eggs
  • 1/2 cup all-purpose flour
  • 1/2 cup unsweetened cocoa powder
  • 1/4 teaspoon baking powder
  • 1/4 teaspoon salt

Peanut Butter Topping:
·       6 oz (light) cream cheese, softened
·       1/2 cup peanut butter
·       1/4 cup white sugar
·       1 egg

Note: The original recipe required milk, but I (accidentally) left it out of the recipe. The brownies came out well without it. However, if I do use milk, I may try unsweetened almond milk instead of regular milk.

Directions:

1.     Follow steps 1 & 2 of the Basic Brownie Recipe. Set aside about 1/3 cup of the batter, before spreading it evenly into the greased pan. Remember, ½ c melted butter is replaced by ½ c of mashed bananas and 2T of melted butter.
2.     In a medium bowl, beat cream cheese, peanut butter, 1/4 cup white sugar, and 1 egg, until smooth. Set aside.
3.     Spread the peanut butter filling over the top. Drop the reserved chocolate batter by teaspoonful over the filling. Using a knife, gently swirl through the top layers for a marbled effect.
4.     Bake in preheated oven for 35 to 40 minutes, or until a wooden toothpick inserted near the center comes out almost clean. Cool completely, then cut into bars.

Peanut Butter Brownies - on the pan


Verdict:
These peanut butter brownies are delicious. My husband loves these and did not last that long.  An added bonus is that they make the kitchen smell awesome. After all who can resist peanut butter and chocolate.

That said, I do not think these have enough peanut butter. Next time (and there will be one) I may change the cream cheese and peanut butter ratio, maybe 4 oz cream cheese and ¾ cup of peanut butter. I may even use chunky peanut butter and add the almond milk for a nuttier combination.

Hope you enjoy it as much as we did.